Thursday, August 30, 2018

Kay's Poop Emoji Pillow


Kaylie was invited to a birthday party and wanted to make something fun for her friend. Emoji Pillows are our go-to because Kaylie can mostly make these fun gifts by herself! And I love them because they eat away at my stash of tiny but usable scraps. Win/Win!


Learning how to sew is something that Kay wants to do, but doesn't really have the patience for, so when there is a possibility that she might take an interest in the littlest bit I jump on it! Because this is a great skill for anyone and it's really pretty easy to learn. Especially if you go slow, and she goes plenty slow. Thankfully my machine has a speed adjustment slider so I can put it on slow and not scare her to death.


She chose to do a while snowflake "Poop" emoji out of an old blanket I used to make our Christmas tree skirt last year. And the blue heart eyes are poofy because they are fun and her friends loves blue.

Kay was brave enough to try sewing on the mouth. It even turned out pretty good!


And voila, the finished product! Kay loved making it and her friend loved receiving it!! And I loved using up some scraps! And just so you know, it's filled with scraps as well. These cute little Emoji Pillows are fantastic for busting up some scraps!


If you'd like to try your hand at this wonderful little scrap buster and make some cute little gifts, go check out the FREE Emoji Pillow pattern at Pattern for Pirates!! They have some adorable clothing patterns as well!!

The links provided in this post may be affiliate links where I receive a small commission from your purchase at no extra cost to you. Thank you for supporting me, my blogging and my sewing!

Thursday, August 23, 2018

24/7 Tunic


The sewing gods have given me way too much confidence in what I'm doing and made me think I was good enough at this to make Kay's entire back to school wardrobe this summer. The last time the thought crossed my mind (last year) I got one outfit completed and it didn't even fit by the time school started!

Determined not to give up, I jumped into a pattern test! This way I would be forced into making at least 2 shirts and hopefully, Kay would love them both.

Thanks to Ellie & Mac and the new Woman's 24/7 Tunic I was able to make 3 new shirts for Kaylie!


Let me tell you a bit about this pattern. First, it's a very quick sew! The dolman sleeves always make for a quick sew. The tunic length means that you can wear this shirt with leggings without feeling like you're showing off things you don't want to. The bottom of the front and the back of the 24/7 can be made with either another knit or a woven! The mix of knit and woven brings so many possibilities to this look! There is a pretty little pleat in the back to add to the sweet little details of the 24/7.


We used some beautiful bubblegum pink cotton lycra from Surge Fabrics for the knit top and a beautiful white organza (maybe, I honestly don't know the kind of fabric) with pink flowers that my mother-in-law had just given us to play with. I love a good upcycle! And yes, the pink was leftover from the dress I was wearing here.


When I started making this shirt, I realized I was going to need to make some pretty drastic changes to the pattern because it's drafted for a 5' 5" woman and Kay, even with her measurements falling within the smallest size, is only 4' 8". I ended up needing to remove 4.5 inches and chose to remove them from 4 different places across the length of the tunic to pull of this look.


We sure love this shirt. Like I said, we have 3 already. We will show them off eventually. And I will be making a few for myself! If you chose to make one of these adorable shirts, what woven fabric will you use? Do you have any tricks for hemming woven fabrics in a curve? Please share!!

The links provided in this post may be affiliate links where I receive a small commission from your purchase at no extra cost to you. Thank you for supporting me, my blogging and my sewing!

Monday, August 20, 2018

Taylor Tee

Welcome Back Orange and Black!!

Every Fall, as the sleepy little city of Pocatello, begins to cool down and prepare for school to come back into session the town gets painted with bold colors announcing it's welcome to the local university students as they beef up the population and remind everyone of the old glory days. It's hard not to fall into the enthusiasm and fun that all those young people cause with their football and homecoming and learning their fresh faces bring to this small Idaho town.  


This year my boys and I decided to celebrate the return of the Bengals with some fun orange and black tiger print Taylor Tee's from Pickle Toes Patterns! This pattern is quick and easy and the color blocking, while looking a bit overwhelming at first goes together very easily and looks fantastic!!


I chose to make the color-blocked tee for them this time, but this pattern has so many options that I could make them shirts for days and never repeat an option. Along with this fun color blocking, there is also a solid version included, short sleeves, 3/4 length sleeves and long sleeves with a thumb hole!  There is this shirt length and tunic length as well as a band that can be added instead of just hemming. Oh, and did I mention the hood? So many options!

The Taylor Tee really is a favorite! And we are looking forward to lots more in the future!


I love the fact that they still like to match! 

The orange and black fabric is beautifully soft double brushed poly (DBP) from Knitpop. It was a custom last fall and they are currently out of stock, but I highly recommend you go check out the other beautiful fabrics they have in stock! The black fabric is an old cotton jersey flat bed sheet that we never used. Upcycling is always a good thing!

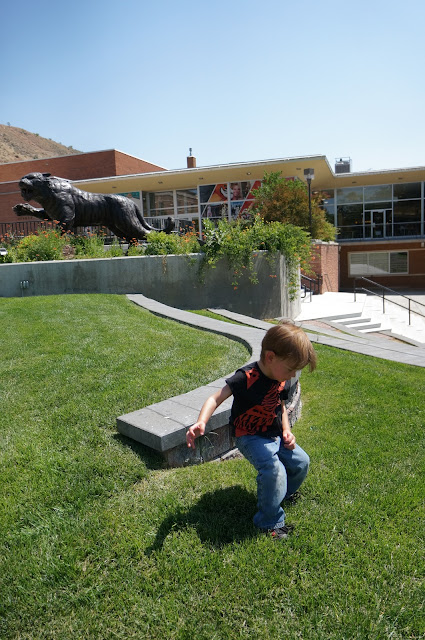
While on campus we had to stop and check out the Bengal statue and jump off the stone bleachers and roll down the hills and play in the green grass. The boys had a great time!


Jump shot in action!

The links provided in this post may be affiliate links where I receive a small commission from your purchase at no extra cost to you. Thank you for supporting me, my blogging and my sewing!

Thursday, August 16, 2018

Sling Chair Reupholstery


Colorful backyard patio sets are all 😍😍 in my book!! 


This one belongs to my parents and happens to have a very special place in my heart because I made them. Well, I didn't actually make them, I reupholstered them. I guess. I'm not really sure what exactly it's called when you replace the fabric on this kind of chair, but that's what I did.


Dad made the mistake of letting Mom and I go into JoAnn's alone to pick out outdoor upholstery fabric. When we came home he wanted to know why I let Mom pick out such colorful fabric! How could I stop her? They turned out great! All that color! All those bright hues breaking up all the shades of grey.


Now, before you go patting me on the back about how awesome and talented I am, know that there is this awesome group on Facebook called DIBY -  the Do It Better Yourself club. This group of people do and create and update and make EVERYTHING and help with the things you are trying to do yourself. It's a very uplifting and satisfying group to belong to.

Anyway, I posted this sad little picture of my parent's patio chairs on the night Mom asked me if there was anything I could do to fix her chairs. There were tons of responses!! One of those responses linked me up to a video on Sailrite on how to replace the fabric on sling chairs. It was an incredibly informative video and guess what? It worked!! They were surprisingly easy to fix once I had the right tools.


Here is the link to the video! It's a great one! If you choose to redo your patio furniture, I'd love to receive links or pictures to see your creations!!

The links provided in this post may be affiliate links where I receive a small commission from your purchase at no extra cost to you. Thank you for supporting me, my blogging and my sewing!

Thursday, August 9, 2018

Tulip Dress


Becoming a tester for Ellie & Mac is a dream come true! When I started sewing clothing for myself several years back, I never dreamed that I would get to a point where I could be testing! And to be chosen to be a tester was just the cherry on top of learning to make all my own clothing and make them well.

In case you are unsure of what exactly "testing" is, I'll explain. The process of creating a PDF pattern has many steps, including: 

Inspiration - finding or having an idea and deciding to make that idea into a pattern.
Drafting - turning inspiration into a pattern.
Pretesting - a fast and dirty test of the pattern to see if the conception even goes together properly.
Testing -  a group of people over all the sizes offered to sew up the pattern and all it's options to see if they all work correctly for what has been drafted, sometimes the testing step can require multiple garments to be sewn to make sure the fit is just right.
Releasing - a pattern becomes open to the general public for sale.

Testing is my favorite step, by far! I love the challenge of needing to figure out a new pattern and decide if it fits the way the designer intended and help figure out ways to make the pattern even better while keeping the designer's vision intact. Not to mention the fact that I basically get forced into making 2 or 3 beautiful new garments in a very short time.

So, here we are at the beginning of my E&M testing career and the first thing I get to test is the beautiful Tulip Dress and Tunic. I couldn't believe I had signed up for such a beautiful and SEXY dress. What on earth was I thinking? There was no way I could squeeze myself into a figure-fitting dress and then take pictures and show it off all over the internet!!


Fabric is 10 oz 2-tone Denim Blue Cotton Lycra Jersey and Bubblegum Cotton Lycra Jersey from Surge Fabric Shop.


But I did! And guess what? The dress was so flattering and so comfortable!! And I felt beautiful!!


All photos credited to my wonderful husband, Coby!


The ruching was a little difficult to work out at first, but by the time I got to the third dress it was simple and the whole dress came together like a dream!


The Tulip Dress and Tunic has a long, narrow scoop neck and several options to make the dress/tunic perfect. The options include different sleeve lengths: short, 3/4 and long. I have even seen the pattern hacked to be sleeveless (she used a thin facing to avoid bands). The dress has 2 lengthen and shorten lines to help with tall and short fitting. I needed them quite desperately because I'm 5 inches shorter then what the pattern is drafted for. This pattern can also be shortened into a tunic! That's pretty impressive! I need to get a tunic made because I love this pattern!

I am so grateful for the chance to test the Tulip Dress and Tunic and can't wait to make more!!

Be sure to swing past Ellie & Mac and check out this dress and all of their other great patterns!

The links provided in this post may be affiliate links where I receive a small commission from your purchase at no extra cost to you. Thank you for supporting me, my blogging and my sewing!

Thursday, August 2, 2018

Welcome to my Mess!!

Welcome to the mess! Sorry About the Mess! But this is me!

Well, this isn't what I look like all the time. Thank goodness!


My name is Nellie. And I am a sew-a-holic. Seamster or sewist, if you don't mind. And because I feel deeply compelled to sew each and every day the house tends to fall into massive disarray with 3 children running around trying to avoid their chores. And that is why everything is Sew Messy.

Introducing the crazy, messy clan!!


This is Oly! And yes, those are chocolate glasses he has made for himself. I guess he wanted to look like his brother. He's the youngest of the mess makers! And he LOVES everything Momma makes! Matter of fact, he tends to get very upset if I show him something new and it doesn't belong to him. He makes my heart happy!!


Here is Riven! This picture is a little old, but check out that hair! Messy as all get out. And he likes it that way! It's a lot longer now and his glasses are a bright blue and yellow, but he still has that crazy messy hair! He also loves everything I make him, and is currently begging for a jacket, hopefully I can get it done before school starts! He is pretty sure Momma can make absolutely anything and has asked for some pretty outrageous costumes for Halloween, I'm not sure if I should be sad or no when saying that I have yet to disappoint him.


Here is Miss Kay! The oldest of the bunch. This picture is a few years old and she has much better taste in clothing now. It does help that I make most of it for her (I didn't make any of this outfit). We have actually spent a lot of the last year or so fighting over clothing because we have different tastes in color and fit, but we are beginning to come to the understanding that just because I made it and she doesn't like it doesn't mean she has to wear it, but she does need to tell me EXACTLY what she doesn't like about it so I can fix the next one. She is also slowly learning how to become my model and she learns how to get comfortable in front of the camera and I get more comfortable behind the camera.


And here is Coby, the love of my life. His encouragement and hard work are part of the reason I get to sew so much. He supports me and challenges me and loves me, even when he comes home and dinner isn't made and the kids are crazy and the house is a complete disaster! I sew for him occasionally. Most of what I make is pattern-less designs for his hiking ventures and the occasional tee shirt.

And then there is me. There isn't much more to me then my family and my messy sewing. I've been sewing clothing for almost 4 years now, but only made my first shirt 2 years ago, the rest were self-drafted pajama pants. I am excited to begin this journey of messy sewing! Thanks for joining me! And sorry about the mess!